Last updated November 18, 2026

Free written scope consultation - allowances, timeline, and change-order rules on paper before a single trade is scheduled
Home Additions & ADU Troubleshooting: Common Problems and How to Fix Them
Water intrusion at a new addition’s roofline is the number-one callback issue in California home additions, and it’s almost always traceable to a flashing detail that was rushed or skipped entirely. Not the shingles. Not the underlayment. The small, unglamorous metal work where the new roof meets the old one, where a wall meets a roof plane, where a chimney pokes through. In our experience around Buena Park, a contractor who gets the flashing right on a Tuesday afternoon saves a homeowner a five-figure repair two winters later. This guide walks through the problems that actually show up on additions and accessory dwelling units, how to spot them, and how to resolve them before they cost you. You’ll learn the scope documents that prevent billing fights, the structural and integration failures inspectors catch, and what to do when a project stalls mid-build.
Quick Answer
Most home addition and ADU problems trace back to three root causes: a contract that didn’t define scope tightly enough, a framing or flashing sequence done out of order, and integration failures between the new structure and the existing house. Fix them by documenting scope line by line before signing, verifying inspection sign-offs at each phase, and treating water management at the roofline as the single most important detail on the job. A written workmanship guarantee like the 730-Day Done Right Promise gives you a resolution path when a defect surfaces after the crew has left.
Styles & brands we work with
- Kitchen remodeling
- Bathroom remodeling
- Home additions & ADU
- Roofing
- Windows & doors
- Driveway & pavers
- Fence
Table of Contents
- Scope Creep: How to Document Before It Becomes a Billing Dispute
- Structural Red Flags: Foundation and Framing Done Out of Sequence
- Water Intrusion at the Roofline: The Flashing Detail Everyone Rushes
- Electrical and HVAC Integration Failures Between New and Old
- What Inspectors Actually Catch on Additions and ADUs
- When Your Project Stalls and the Contractor Stops Communicating
- What a Real Workmanship Guarantee Does for You
- The Punch List: Defining “Finished” Before It Becomes an Argument
Scope Creep: How to Document Before It Becomes a Billing Dispute
The most expensive problems on a Buena Park addition rarely happen in the framing or the drywall. They happen in a contract that says “electrical included” without listing how many outlets, or “finished to match existing” without specifying the trim profile. When the homeowner and the contractor each picture a different finish, the conversation at punch list time turns into a negotiation over a change order. That’s where budgets break.
Scope creep isn’t always the homeowner asking for extras mid-build. Often it’s ambiguity baked into the original agreement. The fix is to insist on a line-item scope document before a single permit is pulled, then carry that document through every phase.
- Get a written line-item scope. Every trade, every fixture, every material named by brand and model where it matters. “Tile allowance” is not a scope; “60 square feet of floor tile up to $8 per square foot” is a scope.
- Define exclusions explicitly. If the bid doesn’t include landscaping repair, painting the existing hallway, or relocating the gas meter, write that down. Exclusions cause more disputes than inclusions.
- Document every verbal conversation in writing. A quick email after a site walk that says “confirming we discussed moving the closet wall 18 inches, which adds $X” protects both sides.
- Require signed change orders before work proceeds. No verbal approvals, no “we’ll sort it out at the end.” A legitimate contractor puts changes in writing and prices them before the work, not after.
- Photograph the site on day one. Existing conditions, existing damage, the state of the shared wall. This is your baseline if a dispute arises.
In Buena Park’s tighter lots, where additions often bump against a property line or an existing garage, unclear scope around setbacks and easements causes delays that push the schedule. The city’s planning department wants a clear site plan before it approves anything, and so should you. Get the scope right at the front end and the rest of the build follows the plan instead of the argument.
Structural Red Flags: Foundation and Framing Done Out of Sequence
Sequence matters more than almost anything else in structural work. A foundation poured before the soil is properly compacted, or framing hung before the ledger board is correctly flashed and bolted, creates problems that don’t show up for months. Here are the specific signs that something was done out of order.
- Hairline cracks radiating from corners of new door and window openings within the first year. This often points to differential settlement, where the new foundation and the existing one are moving at different rates because the soil under the new footing wasn’t prepared correctly.
- Doors that stick in one season and swing free in another. Some seasonal movement is normal, but a door that binds hard in the summer and clears in the winter on a brand-new addition usually means the header or the framing connection to the existing structure is moving.
- Visible gaps between the new addition’s siding and the original house wall. The two structures are separating. That’s a ledger or shear connection problem, and it needs a structural engineer’s eyes.
- Bouncy or uneven floors on the new section. Joist hangers installed on the wrong side, subfloor glued and nailed out of sequence, or undersized joists for the span.
- Nail pops in straight lines across the ceiling. Sometimes it’s just drywall shrinkage. Sometimes it’s a truss or rafter that’s moving because the connection wasn’t done to spec.
California’s seismic requirements mean the connection between a new addition and an existing structure has to be engineered, not improvised. Around Buena Park, homes built in the 1950s and 1960s often have older framing that needs a shear transfer detail when an addition attaches to it. If the contractor can’t show you the engineered plans for that connection, that’s a red flag. Have a licensed structural engineer review it before the drywall goes up, because after the drywall is up, you can’t see it.
If you already have an addition in progress and want a second set of eyes on the structural work, the team behind our Home Additions & ADU in Buena Park service reviews plans and framing before the walls close. Do that inspection early. It’s far cheaper than fixing a failing connection later.
Water Intrusion at the Roofline: The Flashing Detail Everyone Rushes
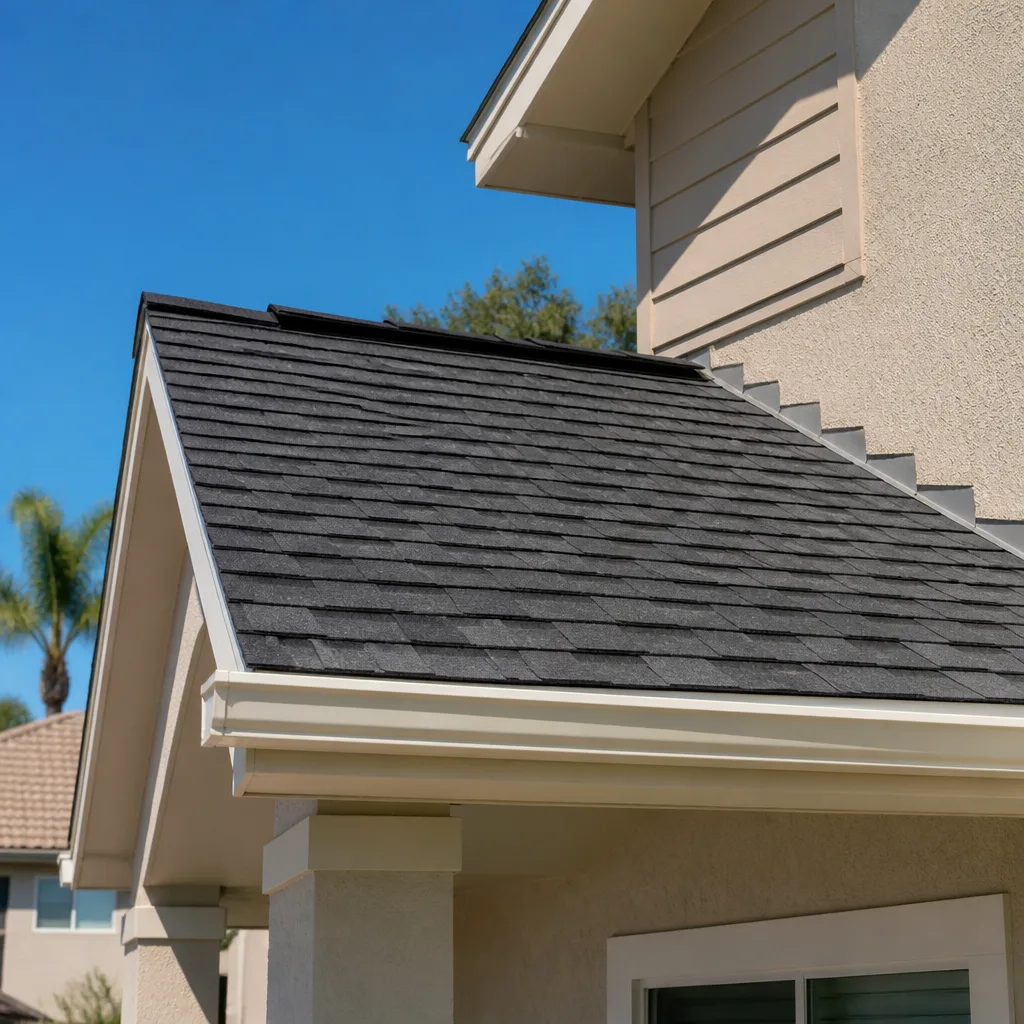
Flashing failures are the single most common reason a new addition leaks. The roofline where the new roof meets the existing wall, the ridge where two roof planes meet, and the transition at a chimney or skylight are all points where a rushed detail leaves a gap. In Buena Park’s dry climate, homeowners sometimes don’t notice the leak for a full season because the roof gets so little rain exposure during the dry months. By the time the first real storm hits, the wood rot has been quietly setting in.
Here’s what proper water management at a roofline transition needs:
- A pre-flashed, stepped counter-flashing system where the new roof meets the existing wall. Not just caulk. Caulk is not flashing. It’s a temporary seal that fails in two to three years.
- A kick-out flashing at every wall-to-roof termination. This is the small diverter that pushes water away from the wall and into the gutter. It’s often skipped because it takes a few extra minutes and it’s hard to see once installed.
- Properly lapped underlayment. Every layer should lap over the one below it in the direction of water flow. If any layer laps the wrong way, water gets trapped under the shingles.
- Ice and water shield at the low-slope sections. Additions often create low-slope transition zones where standard shingles don’t perform. These need a peel-and-stick membrane underneath.
- Brand-appropriate accessory products. A premium shingle paired with cheap flashing and off-brand underlayment defeats the purpose. At our home base, our team works with systems from Owens Corning and IKO, and we pair those shingles with the manufacturer’s own flashing accessories where they exist, because a matched system performs better than a mix-and-match one.
If you’re in a Buena Park neighborhood with mature trees, like the streets around William Peak Park, debris traps at the valley flashing almost guarantee a slow leak if the detail wasn’t done right. After the first rainy season, get up on the roof (or have someone who knows what they’re looking at get up there) and check the joints. The time to catch a flashing failure is before it soaks the framing.
Electrical and HVAC Integration Failures Between New and Existing Structure
Electrical and HVAC integration is where additions quietly fail inspection, and where problems hide behind drywall. The new addition needs its own circuits, its own load calculation on the main panel, and a ducted or ductless system sized for its square footage. Connect those wrong and the owner inherits a panel that trips, a room that’s 8 degrees hotter than the rest of the house, or an inspection that fails before the drywall is even hung.
Here’s what inspectors look for, and what you should watch for:
- Panel load calculation. A new addition’s electrical load has to be calculated against the existing panel’s capacity. If the panel is already maxed out, the inspector will require a service upgrade or a subpanel. That’s a real cost that should have been in the original scope.
- AFCI and GFCI protection. Bedrooms and living areas in the new addition require arc-fault protection. Kitchens, bathrooms, and outdoor outlets need ground-fault protection. Older homes sometimes have shared circuits that don’t meet modern code.
- Grounding and bonding. If the new addition has any plumbing or gas line, the system has to be bonded to the electrical ground. Inspectors check for this specifically.
- Duct sizing and return air. A new room needs both supply and return air sized for its volume. Adding a supply without a return pressurizes the room and forces air out through gaps in the building envelope, which hurts energy performance and feels drafty.
- Manual J load calculation. For HVAC, a proper load calculation on the combined house-plus-addition, not just the new square footage. Sizing a system based on the addition alone almost always undersizes it.
In our experience, Buena Park homes built before 1980 often have 100-amp panels that were sized for the house as it stood, not for an addition with a home office, an ADU kitchenette, and a mini-split. The panel upgrade cost is real, but knowing about it upfront is far better than discovering it after the inspector red-tags the rough electrical. If you want a full scope document that accounts for panel capacity and HVAC load before you sign, that’s what our free estimate and design consultation is for.
What Inspectors Actually Catch on Additions and ADUs
City inspectors in California see a lot of additions and ADUs, and they know the shortcuts. The failures they catch most often on new construction aren’t exotic; they’re the basics that got skipped under schedule pressure. Knowing what they look for helps you verify your contractor’s work before the inspector’s clipboard decides for you.
- Missing shear wall nailing at the connection to the existing structure. The inspector will look at the nailing pattern on the shear panels where new meets old. If the schedule calls for 8-inch nailing and it’s 12, that’s a fail.
- Anchor bolt spacing and embedment. Foundation anchor bolts must be at the specified spacing and embedded to the specified depth. If they’re off, the framing has to be re-bolted after the fact, which is expensive.
- Fire separation at the common wall. An attached ADU or addition has fire separation requirements between the new and existing dwelling units, especially if the ADU is a rental. Inspectors check the type and rating of the assembly.
- Egress windows in bedrooms. Every sleeping room in the addition needs an egress window sized to code. This is measured, not eyeballed, and it’s a frequent fail when the window was changed mid-build.
- Energy code compliance at the envelope. California’s Title 24 requirements for insulation, glazing, and air sealing are checked at rough frame and final. A window substitution that ignores the U-factor requirement will fail.
- Smoke and carbon monoxide alarms. Interconnected alarms throughout the new and existing structure, with CO alarms near sleeping areas in homes with gas appliances.
Ask your contractor for a copy of every inspection sign-off, not just the final. The rough framing, rough electrical, rough plumbing, and rough mechanical inspections are the checkpoints that catch sequence errors before the drywall covers them. In Buena Park, the building department is thorough and the process moves on its own schedule, so building inspection time into the calendar from the start avoids a stall that could have been planned for.
If you’re planning an ADU or a significant home addition and want a scope document that anticipates these inspection points, call us at (833) 522-5059 for a free estimate. We build the inspection sequence into the project plan so nothing catches you by surprise.
When Your Project Stalls and the Contractor Stops Communicating
Mid-construction stalls come in two flavors. The first is a schedule slip where the contractor is still on site but the pacing has slowed. The second is the harder one: the contractor stops showing up, stops returning calls, and the site sits idle for weeks. The second is a real emergency for a homeowner, and it needs a documented response.
Here’s what to do, in order:
- Put everything in writing immediately. Send a dated email or letter to the contractor’s business address detailing what’s unfinished, the last day of communication, and a request for a written plan with dates. This creates a paper trail that matters later.
- Document the site condition. Photograph the current state of the work. Any exposed framing, open roof sections, or incomplete weather barrier is a real risk, especially as the rainy season approaches.
- Check the license and bond status. California’s Contractors State License Board maintains a public database. Look up the contractor’s license and current bond. If the bond is still active, you may have a claim against it.
- Contact the CSLB directly. File a complaint. The board takes stalled projects seriously, and a complaint often prompts a call from the contractor’s office faster than a homeowner ever could.
- Get an independent inspection of the work in place. Before any new contractor takes over, someone needs to verify that what’s been built is sound and inspectable. Don’t assume the previous crew did it right just because it’s not obviously wrong.
- Plan the takeover carefully. A new contractor can complete a stalled project, but they need the original permit and inspection record, plus a clear written record of what’s been completed and what remains. Ask for a revised scope, a revised price, and a revised schedule that accounts for the completed work.
In Buena Park, we’ve seen stalled projects sit through a winter with open roof framing because the homeowner didn’t know where to start. That’s exactly when the water damage compounds the original problem. If your project is stalled and you’re not sure what to do next, call us at (833) 522-5059. We can inspect what’s in place and give you a written plan to finish it. Calls are answered by a live person around the clock.
What a Real Workmanship Guarantee Does for You
Most contractor warranties are short, conditional, and written to be hard to use. A one-year warranty that requires the homeowner to prove the contractor was negligent, and that expires before the defect is visible, doesn’t do much. What a homeowner actually needs is a warranty that creates a resolution path when something fails after the crew has moved on to the next job.
The 730-Day Done Right Promise works differently because it’s built around a simple obligation: if the workmanship isn’t right, it gets fixed. Two full years covers the seasons it takes for a slow leak, a settlement crack, or a flashing failure to show up. It covers the period where a seasonal heating and cooling cycle exposes an HVAC balancing problem. It covers the first winter of real rain after a summer build.
Here’s what to look for in any warranty you’re offered, whether it’s from us or anyone else:
- Written and specific. The scope of what’s covered, what’s excluded, and the process for filing a claim should all be on paper before you sign the construction contract.
- Long enough to catch slow-failure defects. One year is not enough. Two years covers the first full seasonal cycle after completion.
- No hidden conditions. A warranty that requires the homeowner to maintain records, file within an unreasonably short window, or prove fault beyond a reasonable doubt is designed to be denied.
- Backed by the company, in writing. Not a verbal promise at the final walkthrough, and not a warranty that depends on the individual crew that did the work.
When a homeowner is deciding between two bids on a Buena Park addition, the difference is rarely in the headline price. It’s in what happens two years after the final walkthrough. A long workmanship guarantee isn’t a marketing line. It’s the difference between having a resolution path and not having one.
The Punch List: Defining “Finished” Before It Becomes an Argument
The punch list is where scope disagreements surface. If the contract said “finished to a professional standard” without defining what that means, the final walkthrough turns into a negotiation over tiny cosmetic items that should have been spelled out months earlier. Define the finish standard before framing starts and the punch list is a checklist, not an argument.
A workable punch list standard includes:
- Paint finish. Two coats of a specific brand and sheen, with touch-ups to be complete before final payment. Specify the coverage.
- Trim and millwork. The profile, the material, the joint tolerance. If gaps over 1/16 inch require filler, state that.
- Tile and flooring. Grout line width, lippage tolerance, and the approved layout drawn on the subfloor before setting.
- HVAC balancing. Every room must be within a specified temperature range of the thermostat setpoint during a live test. See the test performed before final.
- Final cleaning. Interior and exterior, including window glazing and debris removal, before final payment is released.
Pair the punch list with a payment schedule that holds a meaningful percentage (often 10%) until the list is complete and signed off. That arrangement aligns incentives. If the final payment is due the day the crew leaves, there’s no leverage to get the last details done.
When we scope an addition or ADU, we include the punch list standard in the contract itself. That’s part of what makes upfront pricing actually mean something, because “the number you see is the number you pay” only holds if “finished” is defined in the same document.
Common Mistakes to Avoid
- Signing a bid that says “materials included” without naming the materials. A line item that names the brand and model protects you when the contractor wants to substitute a cheaper product mid-build.
- Skipping the pre-construction site survey. Existing conditions on a Buena Park lot – the state of the shared wall, the location of the sewer lateral, the age of the electrical panel – are all cost drivers. If the survey wasn’t done, the bid is a guess.
- Not pulling the permits yourself to verify. A contractor who says “we’ll pull the permits later” or “we don’t need a permit for that” is flagging a real problem. You can check the permit status directly with the city. Do it before work begins.
- Assuming the new roof will match the existing one after a few months. It won’t. If the new addition is getting new shingles, ask for a brand and color match to the existing roof, and if the existing roof is more than 10 years old, plan for the color to be noticeably different.
- Letting the contractor choose the HVAC contractor as a subcontractor without a written scope. The HVAC design has to be coordinated with the electrical and framing plan. If those three trades aren’t talking to each other, the room will be uncomfortable.
- Waiting until the punch list to flag concerns. If something looks wrong during framing, say something then. Once the drywall goes up, the cost to open the wall and fix it multiplies.
- Accepting a verbal warranty. A warranty that isn’t in writing and doesn’t name what’s covered, for how long, and how to file a claim isn’t a warranty. It’s a gesture.
See the difference
 Before
 After
 Before
 After
 Before
 After
When to Call a Professional
Some problems are worth a homeowner’s own attention. A sticky door that’s seasonal, a nail pop in a single spot, a minor cosmetic gap in trim – those are the small stuff. The ones that need a professional are the ones that could threaten the structure or cost five figures if left alone.
Call a professional immediately if you see: water staining on a ceiling under the new addition’s roofline, a visible gap between the addition’s exterior wall and the existing house, a floor that has developed a noticeable slope or bounce in the new section, electrical breakers that trip repeatedly in a room that was just wired, or a building inspector’s red tag on any phase of the work. Also call if your contractor has stopped showing up and the project is exposed to weather.
Groundwork Construction Co. of Buena Park offers free estimates in Buena Park. Call (833) 522-5059 and we’ll walk the site with you, review what’s been done, and give you a written plan with a fixed scope and price. Our technicians have up to 12 years of experience, and every project is covered by the 730-Day Done Right Promise. If a problem we fix ever recurs, we come back and make it right.
Frequently Asked Questions
Roofline water intrusion repair in Buena Park typically runs $600 to $2,500 depending on how much of the flashing has to be redone and whether any framing or drywall behind it has rotted. A simple counter-flashing repair at the wall transition is on the low end; a full teardown of a low-slope transition with sheathing replacement is on the high end. The critical step is diagnosing where the water is actually entering, because the visible stain and the entry point are often 10 or 15 feet apart. Call (833) 522-5059 for a free estimate. We inspect the whole roofline transition, not just the wet spot.
Often yes, but it usually requires either a panel upgrade or a subpanel to serve the ADU’s circuits. California’s ADU rules allow the addition, but the electrical service has to support it under current code, and the panel load calculation is done during the permit review. The cost of a panel upgrade in this market typically runs $2,500 to $4,500 depending on the service entrance condition and whether the meter has to be relocated. That cost should be in your scope document before you sign. Call us at (833) 522-5059 to schedule a free site evaluation.
The most common structural problem is a poorly detailed connection between the new addition’s framing and the existing house, particularly inadequate shear transfer or a ledger that wasn’t flashed properly. California’s seismic requirements mean the two structures have to move together during an earthquake, not separately, and the connection is where that gets designed. Around Buena Park, homes from the 1950s and 1960s often have framing that wasn’t engineered for a later addition, so the connection detail has to be designed by a structural engineer, not improvised by the framer. Call (833) 522-5059 if you want a pre-drywall structural review.
It depends on the warranty. A standard one-year contractor warranty usually expires before a slow seasonal leak becomes visible, which is why so many homeowners end up paying out of pocket. The 730-Day Done Right Promise covers workmanship for two full years, which is long enough to catch the seasonal failures that show up after the first or second winter. Read the warranty document before you sign the construction contract, not after. To see how the promise works in practice, call (833) 522-5059.
Look up the license number in the Contractors State License Board’s public database at cslb.ca.gov, and confirm the license is active and the bond is current. The local pro we connect you with is licensed and insured as the state requires, and we’ll provide the license number for verification before any work begins. Never start work on an addition or ADU with an unlicensed contractor, no matter how good the bid looks.
Send a written notice to the contractor’s business address, photograph the current site condition, check the contractor’s current license and bond status, and file a complaint with the CSLB if the contractor is unresponsive after a week. Do not let a stalled project sit through the rainy season with open framing or missing weather barrier. If you need a takeover inspection and a written plan to finish the job, call (833) 522-5059. We can assess what’s in place and give you a fixed-price scope to complete it, backed by the 730-Day Done Right Promise.
The Bottom Line
The problems that destabilize a home addition or ADU in Buena Park usually start on paper, not on the job site. A contract that defines scope line by line, a schedule that sequences the structural and the electrical and the HVAC work correctly, a roofline flashing detail done with matched manufacturer accessories, and a written workmanship guarantee that actually covers two full seasons – those four things prevent the vast majority of the callbacks we see. When something does go wrong, document it early, put everything in writing, and get an independent inspection before the next contractor touches the site. Call (833) 522-5059 to schedule a free estimate and design consultation. We’ll bring the scope document, the inspection sequence, and the fixed price with us, and if the workmanship isn’t right, we make it right.
Written by the team at Groundwork Construction Co. of Buena Park.