Last updated November 18, 2026

Free written scope consultation - allowances, timeline, and change-order rules on paper before a single trade is scheduled
DIY vs Professional Fence Installation: What’s Safe to Do Yourself
Setting a post in quick-set concrete without properly sloping the top of the footing is how roughly 30% of DIY fence posts rot from the inside out before the warranty period ends. The water pools on a flat crown, seeps into the wood grain, and the decay starts at the ground line where you can’t see it. Two rainy seasons later the post is soft at the base and the whole run is leaning. We’ve pulled enough of these out of Buena Park backyards to know the pattern. This guide draws the honest line between what a careful homeowner can handle and what genuinely needs a pro, including real cost comparisons, the utility locate step most people skip, and the three site conditions that make DIY fencing risky no matter how handy you are.
Styles & brands we work with
- Kitchen remodeling
- Bathroom remodeling
- Home additions & ADU
- Roofing
- Windows & doors
- Driveway & pavers
- Fence
Quick Answer
Replacing fence panels, swapping boards, and changing hardware on posts that are already sound are genuinely DIY-appropriate jobs for a homeowner with basic tools. Setting new posts, digging footings to the right depth for your soil, and laying out a run are professional-tier work. Those tasks fail invisibly and expensively. Full professional fence installation in Buena Park typically runs $35 to $65 per linear foot depending on material, while DIY materials alone run $15 to $30 per foot once you account for concrete, hardware, and the waste from miscuts. The gap is smaller than most people assume.
Table of Contents
- What Fence Work Is Actually Safe to Do Yourself?
- Why Post Layout and Footing Depth Are Professional-Tier Tasks
- The Utility Locate Step You Cannot Skip (Call 811)
- DIY vs Partial DIY vs Full Professional: Real Cost Comparison
- Three Conditions That Make DIY Fencing High-Risk
- Buena Park Climate, Soil, and Permit Context
- How Material Choice Changes the DIY Equation
- Common Mistakes to Avoid
- When to Call a Professional
- Frequently Asked Questions
- The Bottom Line
What Fence Work Is Actually Safe to Do Yourself?
Here’s the honest answer: anything that doesn’t require disturbing the ground or the structural anchor is fair game. Panel replacement, board swaps, gate hardware, and cosmetic repairs are all realistic weekend projects. We’ve walked Buena Park homeowners through dozens of these over the years, and the ones who stick to this boundary rarely call us back for a correction.
Specifically, these tasks are DIY-appropriate:
- Replacing individual pickets or boards. A cordless drill, a hammer, and a pry bar get this done in an afternoon. Budget two to four hours for a dozen boards on a standard dog-ear cedar run.
- Swapping fence panels between existing posts. If the posts are solid and plumb, you can lift out a damaged panel and drop in a new one. Two people, three hours, no concrete.
- Gate hardware replacement. Hinges, latches, and self-closing springs are bolt-on work. A socket set and 45 minutes.
- Staining and sealing. The best thing you can do for fence life, and totally within reach. A pump sprayer and a roller handle a 100-foot run in a weekend.
- Minor post caps and trim. Cosmetic, low-risk, no digging.
What’s not DIY-appropriate, even for a confident homeowner: digging new footings, setting new posts, laying out a run, grading for slope, and any fence that retains soil. These require soil knowledge, utility clearance, and a level of precision that doesn’t show up until the ground moves. If your fence work touches the ground, treat it as professional terrain.
Panel-only work on existing posts is the sweet spot. If your posts are sound, you can replace every panel on a 150-foot fence for $1,200 to $2,000 in materials and a couple of Saturdays. If the posts are failing, you’re not in panel-replacement territory anymore. You’re in post-setting territory, and that’s a different conversation.
Why Post Layout and Footing Depth Are Professional-Tier Tasks
Post layout and footing depth are where most DIY fences fail, and they fail quietly. A post that’s two inches off-plumb doesn’t look wrong in week one. By month eight, after a couple of Santa Ana wind events and a wet winter, the whole run has a visible lean and the gates don’t latch. We’ve corrected more Buena Park fence runs from this exact problem than any other.
Layout is a math problem with a cost multiplier. Standard post spacing runs 6 to 8 feet on center, and the number matters because panels are manufactured to fixed lengths. If your spacing drifts to 8 feet 4 inches on one section because you eyeballed the run, you’re cutting custom panels, buying extra material, and losing a full day. On a 120-foot run, sloppy layout typically adds $400 to $700 in wasted material and hardware. That eats most of the DIY savings on a smaller job.
Footing depth is the deeper problem. In Southern California, code generally calls for post footings that extend below the frost line, which in Buena Park is effectively zero, but depth is still governed by soil conditions and fence height. What actually matters here is clay soil behavior. Buena Park has pockets of expansive clay, particularly in the older neighborhoods near Beach Boulevard and the tracts off Knott Avenue. Clay swells when wet and shrinks when dry. A post set in a 24-inch footing in clay will heave and settle through the wet-dry cycles, and no amount of quick-set concrete prevents that if the footing is too shallow or the hole is bell-shaped wrong.
Here’s what proper footing work actually involves:
- Soil assessment. Identify whether you’re in sandy loam, clay, or fill. Each calls for a different hole diameter and depth.
- Hole depth. A general rule is one-third of the post’s above-ground height, plus 6 inches for the gravel base. An 8-foot post gets a 30-to-32-inch hole.
- Hole diameter. Three times the post width. A 4×4 post needs a 12-inch hole.
- Gravel base. Two to three inches of drainage gravel below the concrete, so water has somewhere to go.
- Concrete crown. The top of the concrete must slope away from the post at a visible angle. This is the detail from the opening. A flat or dished crown traps water against the wood.
- Plumb check. Every post braced and checked with a level in two directions before the concrete sets.
If you take one thing from this section: the concrete is not the hard part. The layout, the hole geometry, and the crown are the hard part, and they’re invisible once the job is done. Our Fence Installation in Buena Park team handles this work routinely because it’s the single most common source of callbacks on DIY jobs.
The Utility Locate Step You Cannot Skip (Call 811)
Before any post goes in the ground, you call 811. That’s the national call-before-you-dig number, and it’s free. In California, calling 811 at least two working days before you dig triggers a locate request that gets your property marked for buried gas, electric, water, sewer, telecom, and irrigation lines. The service is free and required by law in most jurisdictions. Skipping it isn’t a small oversight; it’s a legal and financial exposure.
What happens if you hit a line:
- You pay for the repair. A severed gas line can run $1,500 to $8,000 depending on depth and location. A cut electrical line to a detached garage can exceed that.
- You may be liable for the utility’s response cost. Fire department dispatch, gas crew, and evacuation costs can be assessed back to the property owner in some cases.
- You can be cited. California law requires the locate call before excavation. Fines vary by jurisdiction.
- Your neighbor loses power or water. Shared service lines are common in older Buena Park neighborhoods, and a hit near a property line can take out service on both sides.
The 811 process is simple:
- Call 811 or submit a request online at least two working days before you plan to dig.
- Wait for the utility companies to mark the property. Each utility uses a different color paint or flag.
- Photograph the markings before you start, because rain or foot traffic can erase them.
- Hand-dig within 24 inches of any mark. Never use a power auger near a marked line.
- Keep the ticket number. If a line is hit despite markings, the ticket documents that you followed procedure.
We’ve seen a homeowner in the Buena Park area hit an irrigation line feeding three neighboring properties because nobody had marked the shared lateral. The repair was $2,300 and three days of water shutoff. Calling 811 is the cheapest insurance in fencing. We won’t set a post without it, and neither should you.
DIY vs Partial DIY vs Full Professional: Real Cost Comparison
Most people assume DIY saves 50% or more. The real number is closer to 15% to 35% once you account for materials, tools, waste, and the correction cost of the first mistake. Here’s a straight comparison on a typical 150-foot, 6-foot-high cedar privacy fence in Buena Park. Numbers are line-item ranges based on current local material pricing and standard labor rates.
| Line Item | Full DIY | Partial DIY (Pro posts) | Full Professional |
|---|---|---|---|
| Materials (cedar, hardware, concrete) | $2,400 – $3,600 | $2,400 – $3,600 | $0 |
| Post layout, dig, and set | $0 (your labor) | $1,200 – $2,400 | Included |
| Panel and rail installation | $0 (your labor) | $0 (your labor) | Included |
| Tool rental (auger, level, saw) | $150 – $350 | $150 – $350 | $0 |
| Waste and material overage (10 – 15%) | $250 – $540 | $250 – $540 | Included |
| Labor | $0 | Pro labor on posts only | $2,800 – $4,500 |
| Permit and inspection | Varies | Varies | Pulled by contractor |
| Estimated total | $2,800 – $4,490 | $4,000 – $6,890 | $5,250 – $9,750 |
What the table doesn’t show is the risk cost. If your DIY run develops a post failure within three years, you’re paying for materials again plus the labor you saved the first time. On a full DIY job, a single footing failure typically adds $400 to $900 to redo just the post, panel, and excavation. We’ve seen three in a single run.
Partial DIY, where a professional sets the posts and you handle panels, is often the best cost-per-reliability trade. You get professional footings and layout, and you save the panel labor. The math usually lands within 20% of full DIY while eliminating the riskiest failure mode. If you’re planning other work on the property, bundling with Driveway & Pavers in Buena Park or Home Additions & ADU in Buena Park can spread the site prep cost across multiple trades.
Three Conditions That Make DIY Fencing High-Risk
Some sites are forgiving. Flat, sandy loam, clear property lines, no retained soil. If that’s your lot, a careful homeowner can handle more than you’d think. But three conditions flip DIY from “doable” to “call someone who’s done this a hundred times,” regardless of your skill level.
1. Slope Grade Changes
A fence on grade needs the panels to step, not rack. Racking (tilting the panel to follow the slope) works on small grades under about 4 inches per section, but beyond that the fence panels tilt, gates bind, and the bottom of the fence meets the ground unevenly. On Buena Park’s hillside lots, especially the tracts toward the north end, we regularly see DIY fences that racked a 12-inch grade change across three sections. The gates stopped latching within a year. The correct approach on grade is stepped panels, which require calculating step height per post and adjusting post depth accordingly. That’s fine carpentry plus foundation math, and it’s not a beginner task.
2. Retaining Load on the Fence
A fence that holds back soil is a retaining wall in fence clothing, and it’s a different structural category. If your property slopes and the fence is holding the higher ground, the fence needs engineered footings, drainage behind it, and a redesign that includes proper wall material, not just posts and panels. Standard fence footings are not designed for lateral soil pressure, and a DIY fence that retains even 18 inches of soil can fail catastrophically after a wet winter. We’ve seen a Buena Park fence wall fail and take out 20 feet of a neighbor’s landscaping. This is not a DIY category. If your fence retains soil, get a professional assessment before you buy a single post.
3. Shared Boundary Lines
Half of every fence is your neighbor’s fence, legally speaking. In California, boundary fences are governed by a mix of local ordinance and civil code, and putting a fence on the wrong side of the property line can create a legal mess that costs more than the fence. Before you dig, you need to know exactly where the line is (a survey, not a guess), and you need to talk to your neighbor. Most boundary dispute cases we see start with a homeowner who set posts 6 inches onto a neighbor’s yard because the corner of the lot “looked” like it was further over. A survey runs $400 to $900. Cheaper than a boundary dispute. In Buena Park, older lots near the Buena Park Downtown area sometimes have ambiguous or unfenced boundary lines from decades of informal repairs. That’s exactly the situation where professional layout protects you.
Buena Park Climate, Soil, and Permit Context
Buena Park’s climate is mild enough that fences last a long time if they’re installed correctly, and short-lived if they aren’t. Coastal marine layer, dry summers, and the Santa Ana wind events push fence footings in ways inland homeowners don’t deal with. We plan our fence builds around the local realities because they map directly onto the DIY boundary.
- Marine air corrosion. Salt-laden air accelerates corrosion on metal fasteners and hinges. Stainless or hot-dipped galvanized hardware is standard here; standard zinc-plated fasteners fail within four or five years on coastal-facing fences.
- Santa Ana winds. Annual wind events of 40+ mph put lateral load on fence panels. A footing sized for a 6-foot fence in still air is under-built for a 60 mph gust. Post depth and footing diameter matter more here than in most of the country.
- Expansive clay in patches. The older neighborhoods off Beach Boulevard and around the Buena Park Metrolink station have soil that moves with moisture. Footing depth and gravel base matter more in clay than on sand.
- Summer irrigation. Most Buena Park homes water heavily in summer, which means constant wet-dry cycles at the base of the fence. A properly sloped concrete crown at the top of the footing is the difference between 10 years of post life and 25.
On permits: fence height in Buena Park generally runs up to 6 feet in the rear and side yards, up to 3 feet in the front setback area, with corner lot visibility triangles affecting front-yard fencing on corner properties. If you’re building anything taller, or a fence that retains soil, expect a permit. The city’s planning counter can confirm current limits, and it’s worth a call before you commit to a design. Skipping the permit is one of the more expensive mistakes because a non-compliant fence can be required to come down. That’s a different category of loss than the DIY savings.
We treat permits as a normal part of the job. Our team pulls them, schedules inspections, and doesn’t close a job until the inspection passes. That’s part of how the Groundwork Construction Co. of Buena Park home approach works across every service line. For a homeowner weighing the DIY path, the permit piece is another argument for professional execution.
How Material Choice Changes the DIY Equation
Not every material is equally DIY-friendly, and the marketing around “easy install” fence systems has created unrealistic expectations. Here’s how the common materials stack up on a DIY difficulty scale.
- Cedar dog-ear privacy fence. Conventional, forgiving, DIY-repairable. Panel replacement is straightforward, but post-setting has all the standard risk. Materials for 150 feet run $2,400 to $3,600.
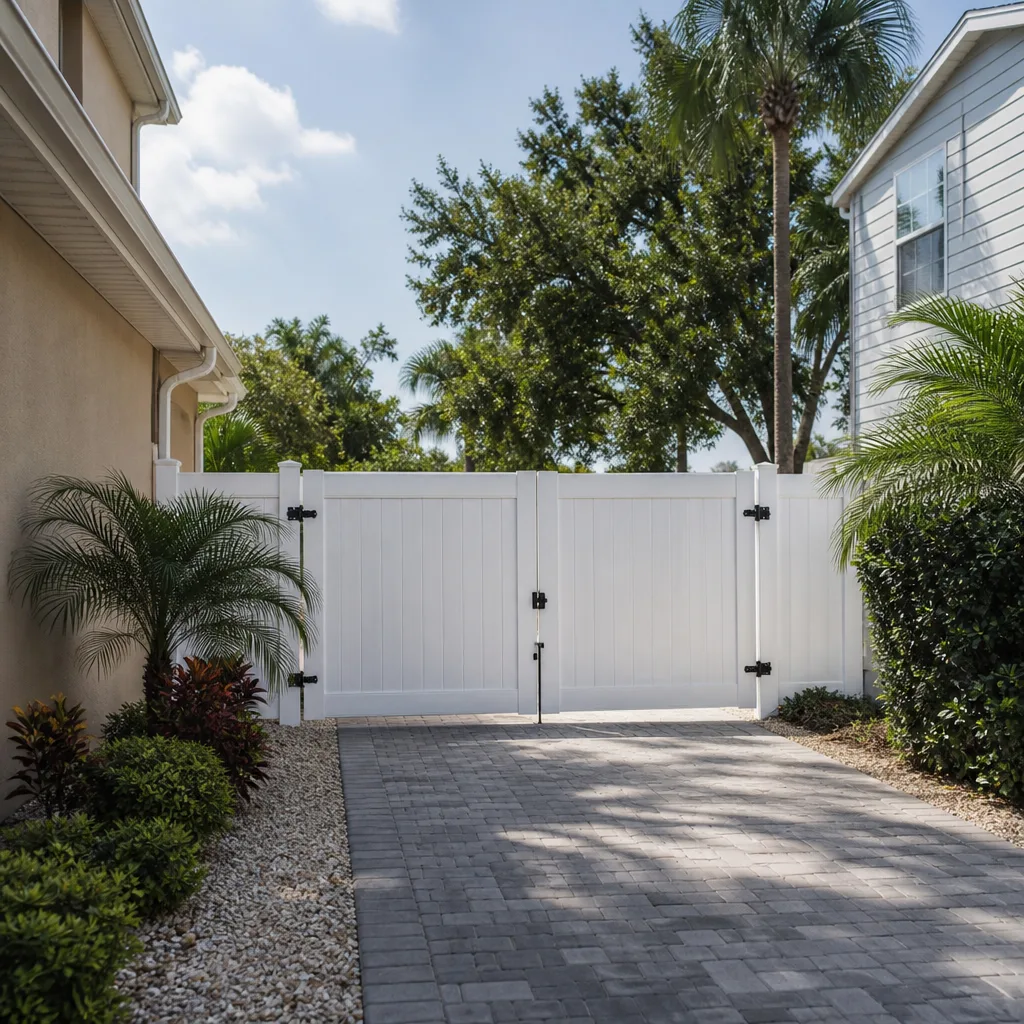
- Vinyl fence. Heavier than it looks. Panels come pre-assembled and post spacing must be exact because there’s no give in the material. Not a beginner install. High-ticket per linear foot, $40 to $75.
- Composite fence. Similar to vinyl in weight and rigidity, plus expensive material. A misaligned post on composite isn’t a $40 correction, it’s a $200 one. $50 to $85 per linear foot.
- Chain link. Genuinely DIY-appropriate if you’re patient. Posts are set in concrete (same footing risk), but panels are modular and forgiving. $20 to $40 per linear foot.
- Aluminum ornamental. Rackable panels make it slope-friendly, but the aesthetics depend on precision. Professional install reads clean; DIY usually has visible alignment issues. $55 to $95 per linear foot.
- Masonry or block fence. Not DIY. Period. Structural footing, reinforcement, and masonry skill required. Professional-only.
If you’re leaning toward a higher-end material, especially composite or vinyl, the DIY math stops making sense fast. The material cost is high enough that the risk of any correction wipes out the DIY savings. On a 150-foot composite fence, the material alone is $7,500 to $12,750. A single failed post correction at $600 to $1,200 means you’d have been better off hiring out from the start.
Our team installs with verified material partners across every service line, and the same principle applies to fence work: the material choice drives the installation method, and the installation determines how long the material lasts. That’s why our Groundwork Construction Co. of Buena Park home team writes installation specs per job rather than per material category. The fence installation service page walks through the material catalog if you want to see the range.
Common Mistakes to Avoid
- Setting posts without sloping the concrete crown. A flat or dished top traps water against the wood and rots the post from the inside out. The crown should shed water away from the post at a visible angle. This one mistake alone accounts for a huge volume of the fence post failures we see in Buena Park backyards.
- Skipping the 811 call. Digging before a utility locate is the single most expensive shortcut in fencing. A hit gas line runs thousands of dollars and can put your household at risk. The locate is free and takes a two-day wait. There’s no good reason to skip it.
- Eyeballing post spacing. Fence panels are made to standardized lengths. Eyeball layout across a 150-foot run results in cut panels, wasted material, and $400 to $700 in overage. Measure from post to post, not panel to panel, and adjust the last section for a clean finish.
- Setting posts too shallow in clay. A 24-inch footing in clay won’t hold through wet-dry cycles. Standard requires roughly one-third of the above-ground height plus a gravel base, which for an 8-foot post means 30 inches minimum. In clay, go deeper and wider.
- Racking panels on steep grade. Racking works under about 4 inches of grade change per section. Beyond that, the fence tilts, gates bind, and the bottom of the panel stops meeting the ground cleanly. Stepped panels are the correct method on grade, and they require precise post height calculations.
- Ignoring the property line. A fence 6 inches onto the neighbor’s yard is a boundary dispute waiting to happen. A survey is $400 to $900. A boundary dispute with a neighbor over a fence line is thousands plus legal fees. Confirm the line before you buy a post.
- Building a fence that retains soil without an engineer. A standard fence footing isn’t designed for lateral soil pressure. A DIY fence retaining even 18 inches of soil is a structural failure waiting for a wet winter. This is the one condition where there’s no halfway DIY option.
When to Call a Professional
Call a professional if any of these apply: you’re setting new posts, your fence retains soil, your property has a grade change over 4 inches per section, your boundary line is unclear, you’re installing vinyl, composite, or masonry, your DIY repair involves disturbing the ground within 24 inches of an unmarked utility area, or you need the job permitted and inspected. Those are the conditions where the DIY math stops working. The savings evaporate on the first correction, and the first correction is often invisible for a year or two.
For everything else, the panel swaps and board replacements and hardware jobs, our honest advice is to take it on if you have the tools and the patience. It’s the kind of work that builds confidence and keeps a fence healthy between professional visits. Groundwork Construction Co. of Buena Park offers free estimates in Buena Park on any fence project where the ground is involved. The estimate includes a written line-item breakdown, so you’re comparing actual numbers against your DIY math instead of guessing. Call (833) 522-5059 to schedule.
Frequently Asked Questions
Professional fence installation in Buena Park typically runs $35 to $65 per linear foot for a 6-foot cedar privacy fence, which puts a 150-foot run at $5,250 to $9,750 fully installed. DIY materials for the same run are $2,400 to $3,600, but you’ll add $150 to $350 in tool rental and $250 to $540 in waste, and you’re taking on the footing risk. Call (833) 522-5059 for an exact quote on your property – estimates are free.
Yes, if the posts are solid, plumb, and sound at the base. Panel replacement, board swaps, and hardware changes on existing posts are DIY-appropriate and typically take two to four hours per section. Check each post by pushing hard on it in multiple directions; if there’s any movement, the post is failing and the job moves into professional territory.
Most standard fences up to 6 feet in the rear and side yards, and up to 3 feet in the front setback area, don’t require a building permit in Buena Park, but corner lots with visibility triangles and any fence that retains soil do. Confirm with the city planning counter before you commit to a design. When our team handles the job, we pull the permit and schedule the inspection as part of the project.
You are financially responsible for the repair, which typically runs $1,500 to $8,000 for a gas or electrical line, and may be liable for emergency response costs. You can also be cited under California law for failing to call 811 before digging. The locate is free; the repair isn’t. Call 811 at least two working days before any post hole goes in the ground.
A general rule is one-third of the above-ground post height plus 6 inches for the gravel base, which for an 8-foot post means a hole 30 to 32 inches deep. In clay soil, go wider as well – a 12-inch hole diameter for a 4×4 post – and always add 2 to 3 inches of gravel at the bottom for drainage. Expansive clay in parts of Buena Park will heave a shallow post over wet-dry cycles, and no amount of concrete prevents that if the depth is wrong.
A typical 150-foot cedar privacy fence takes two to four working days for professional installation, including layout, utility locate wait time, post setting, cure, and panel installation. Concrete post footings generally need 24 to 48 hours of cure before panels go on, so plan the schedule around that. Call (833) 522-5059 and we’ll walk through the timeline for your specific property.
The Bottom Line
Fence installation has a clear DIY boundary: work above the ground is fair game, work that touches the ground is professional territory. Panel swaps, board replacement, and hardware changes save real money and are worth taking on. Post setting, layout, footing depth, and any fence that retains soil or sits on meaningful grade are where the silent failures start, and they usually surface a full year after the job’s done. Buena Park’s clay pockets, marine air, and Santa Ana wind events make those failure modes more likely here than in most places. If your project is in the DIY zone, go for it. If it’s in the professional zone, get a written quote and compare it against your real DIY math before you dig.
When you’re ready for a professional quote, Groundwork Construction Co. of Buena Park handles fence projects with a written line-item estimate, permits pulled and inspections passed, and the 730-Day Done Right Promise covering every install. Our technicians have up to 12 years of experience, and calls are answered by a live person, 24/7 at (833) 522-5059. We also offer $1,000 off projects over $10,000 and 0% financing for 18 months. Call today to schedule your free estimate and design consult.
Written by the team at Groundwork Construction Co. of Buena Park.
See the difference
 Before
 After
 Before
 After
 Before
 After